
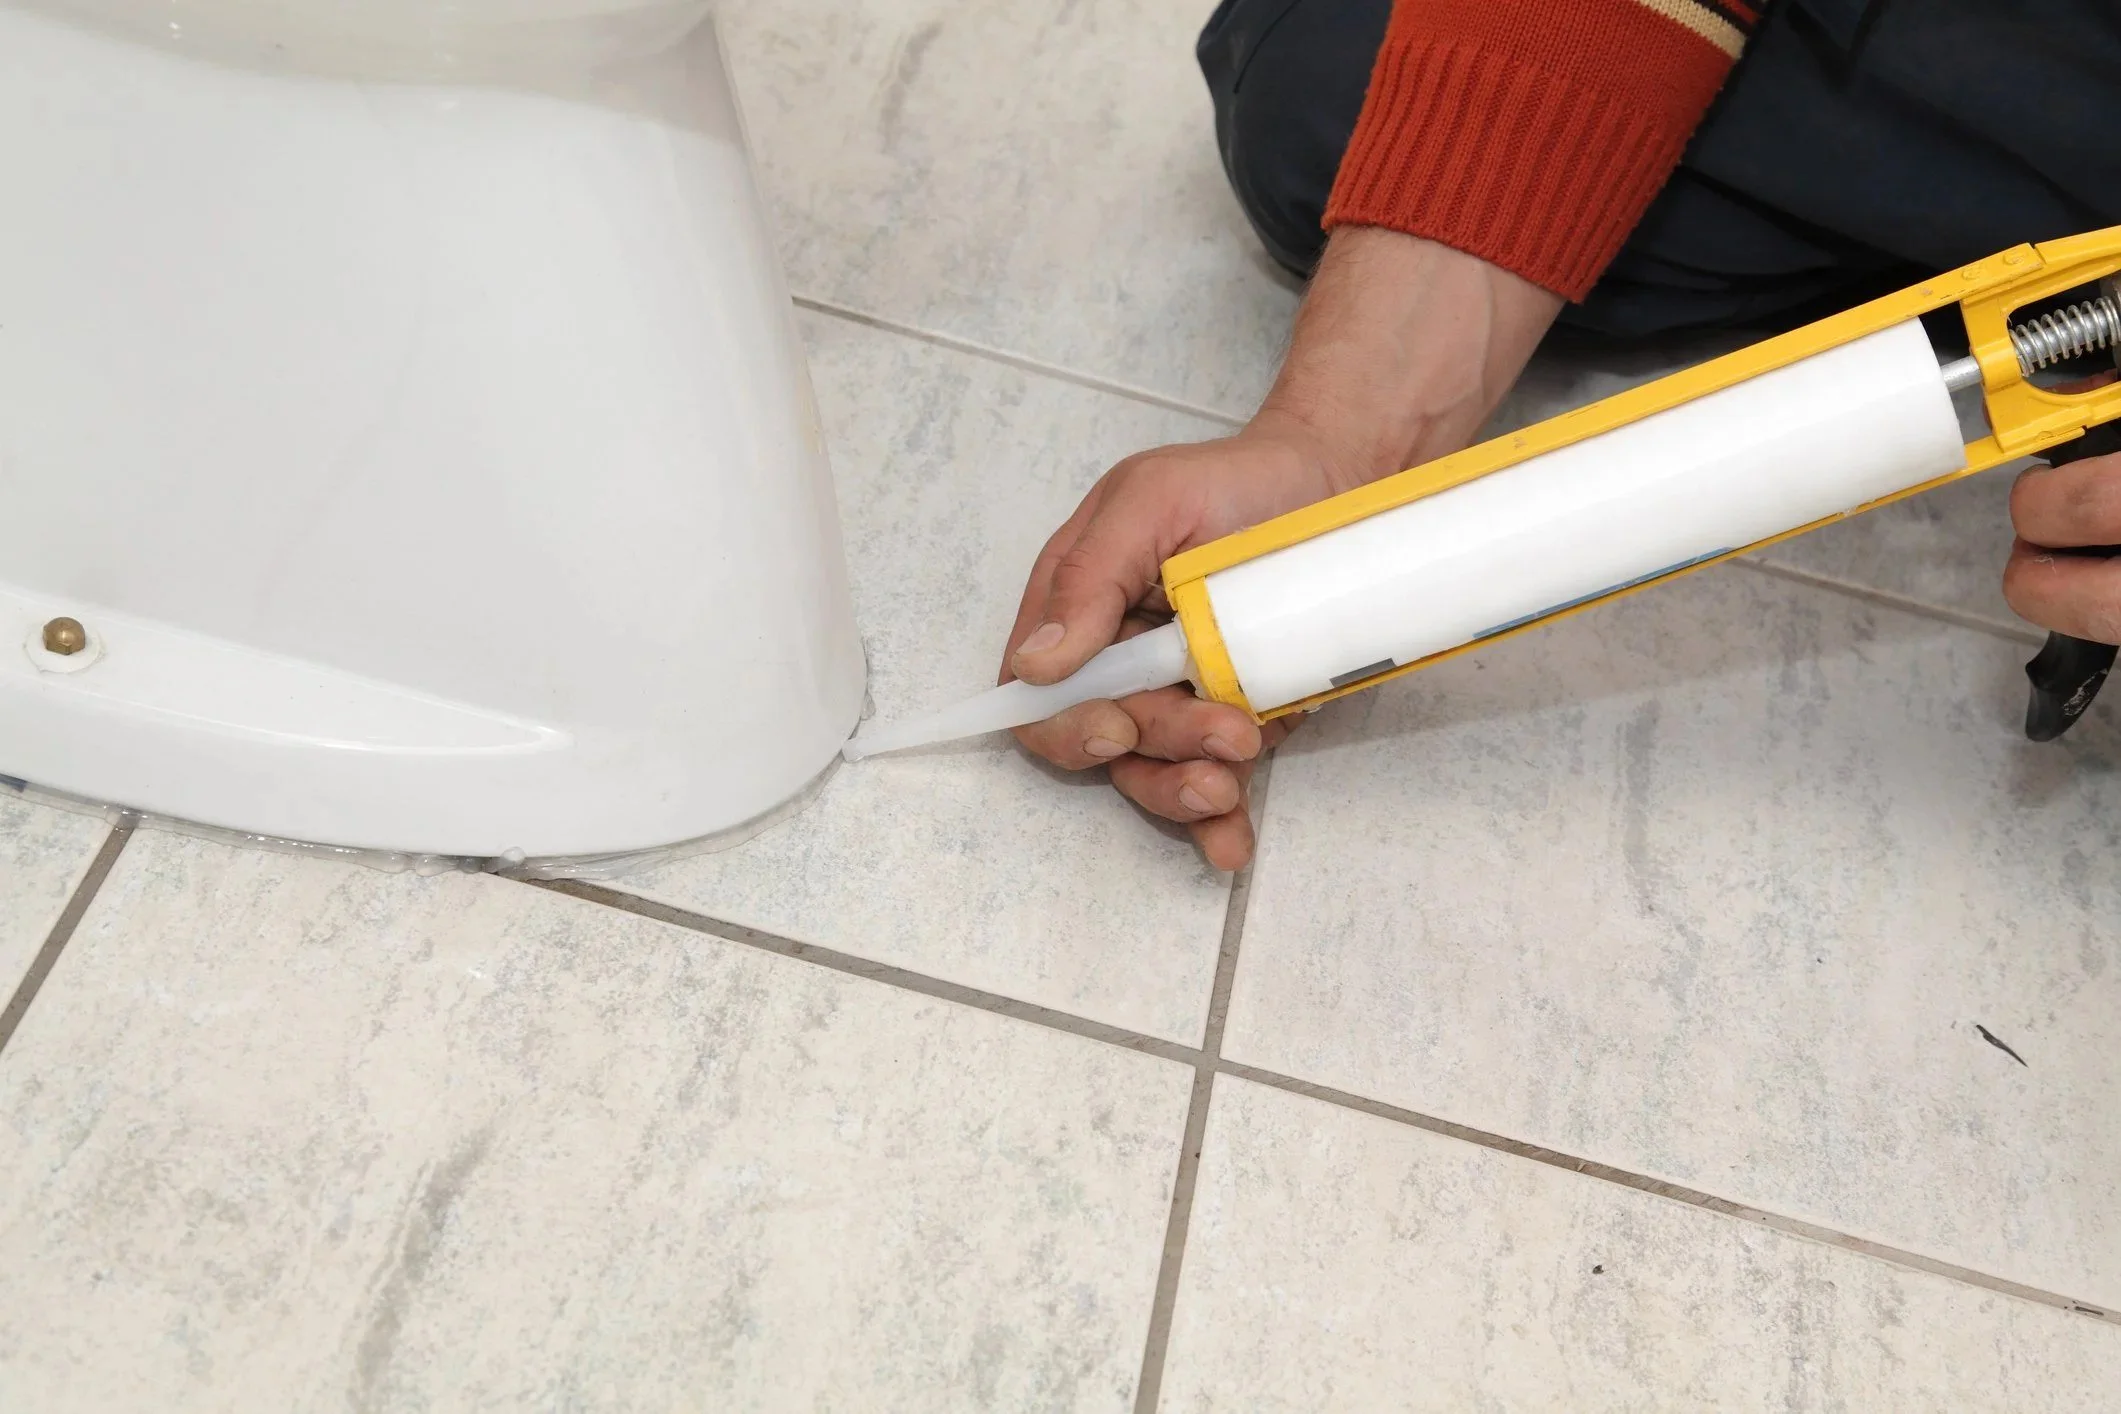
Yes. Caulk around the base of the toilet. In Seattle and the rest of Washington, the plumbing code says the joint where a toilet meets the floor “shall be made watertight,” and the big toilet makers’ instructions say to seal the base. Do it after the toilet is solid and leak-tested, because caulk hides a loose toilet. It doesn’t fix one.
Toilet base checker
Caulk it now, or fix something first?
Tap what you see at your toilet, your floor and what’s below the bathroom. The answer updates as you tap. Nothing you pick leaves this page.
The 3 parts at your toilet base
Your order of work
General homeowner information, not a plumbing inspection. Costs are from my own files and change with time and the job.
This one gets oddly heated online. I’ve walked through a lot of Seattle bathrooms with inspectors and builders, so here’s the rule, the reasoning on both sides, and the order I’d do the work in. Use the checker above for your toilet and floor.
Same job, other names: sealing the toilet base, caulking a toilet to the floor, siliconing around the toilet. The code’s own words are a “watertight joint.” The wax ring (or wax-free seal) is a different part, under the toilet.
The rule
Seattle’s plumbing code says the toilet base must be sealed
Washington builds to the Uniform Plumbing Code, adopted statewide in chapter 51-56 WAC. Seattle adds its own amendments and calls the result the Seattle Plumbing Code; the 2021 edition took effect in Seattle on November 15, 2024, and Public Health – Seattle & King County enforces it.
Section 402.2 is one sentence: where a fixture touches the wall or floor, “the joint between the fixture and the wall or floor shall be made watertight.” Washington and Seattle don’t amend it. The code doesn’t name a product, but around a toilet a bead of caulk is how that joint gets made watertight, and plumbing inspectors do write it up: a 2023 City of Everett final inspection lists “toilet to floor joint not made water tight” under section 402.2.
402.2 Joints. The fixture-to-floor joint must be watertight.
402.3 Securing fixtures. Floor-mounted fixtures must be rigidly secured to the drain and the floor.
402.6 Flanged connections. Bolted to the flange with an approved gasket, washer or setting compound.
402.8 Installation. Install fixtures per the maker’s instructions.
| Section | What it requires | What it means for you |
|---|---|---|
| 402.2 Joints | The fixture-to-floor joint must be watertight. | Caulk the base. |
| 402.3 Securing fixtures | Floor-mounted fixtures must be rigidly secured to the drain and the floor. | No rocking. Fix that before caulk. |
| 402.6 Flanged connections | Bolted to the flange with an approved gasket, washer or setting compound. | The wax ring or wax-free seal. |
| 402.8 Installation | Install fixtures per the maker’s instructions. | Kohler and American Standard both say to seal the base. |
The first version of this post said Seattle follows the International Plumbing Code. It doesn’t; Washington uses the Uniform Plumbing Code. The answer didn’t change, only the rulebook.
The debate
Why people argue about caulking a toilet, and why the code wins
The case for caulk: mop water, splashes and the odd overflow can’t run under the toilet, where they soak the subfloor and the gap is impossible to clean. In a damp climate, that matters.
The case against: if the wax ring fails, caulk might keep the leak from showing at the base, so it rots the floor in secret. It’s a fair worry, and you’ll hear it from some plumbers.
- 1Mop water and splashes on the floor
- 2The caulk bead keeps them out
- 3Closet bolts hold the toilet to the flange
- 4The wax ring seals the toilet to the drain
- 5Subfloor
- 6A failed wax ring leaks down here, caulk or no caulk
- 7It shows up as a stain on the ceiling below
Look at where that leak goes. The wax ring sits under the toilet, on the drain. When it fails, water can run down past the flange into the subfloor whether the base is caulked or not. Skipping caulk is a weak alarm that trades a daily, certain problem (water getting under the toilet from above) for an occasional, uncertain one. The code takes the certain problem, and so do I. The answer to a hidden leak is a better way to find it, below.
Before you caulk
Caulk hides a loose toilet. It doesn’t fix one
Before any caulk, grab the bowl with both hands and try to rock it. It should not move at all. The code says floor-mounted fixtures must be rigidly secured, and a toilet that shifts can break the wax ring’s seal: once the ring has formed to one position, every wobble opens a path for water and sewer gas.
- 01Push testBoth hands on the bowl
- 02Snug the boltsAlternate sides, gently
- 03Still moves?Shim or reset
- 04New wax ringAny time it comes up
- 05Flush testSeveral flushes, look below
- 06Then caulkSeal the base
I watched this play out on a new-construction townhome I sold. The buyer’s inspector could move the toilets by hand. The builder said the plumber and the city had checked them and they were caulked to the floor. The inspector’s point stood: with caulk on, they won’t move, but nobody knows whether the ring sealed. The builder reset them with new wax rings, a part that cost about $2 each.
Often it’s simpler. Pop off the 2 plastic caps at the base and you’ll find the closet bolts; one loosening over time is very common. Snug them a little at a time, alternating sides. American Standard’s instructions warn not to overtighten the nuts or the base may be damaged. If it still rocks, the fix is shims or a reset with a new ring, then caulk.
Step by step
How to caulk around a toilet base, step by step
20 minutes of work, then patience while it cures. Do it on a dry day of use: no showers splashing the floor, no mopping.
- 1Make sure it’s solid. Rock test first. Fix any movement before you seal it in place.
- 2Cut out the old caulk. A utility knife or a plastic caulk remover. Get all of it; new caulk doesn’t stick to old.
- 3Clean and dry the joint. Wipe the base and floor, kill any mildew, and let it dry fully.
- 4Run one steady bead. Cut the tip small at an angle and push the bead along the joint rather than dragging it.
- 5Tool it once. A damp finger or a caulk tool, one pass, then wipe the extra. A smooth, feathered edge looks better and sheds water.
- 6Let it cure. Follow the tube. GE’s Advanced Silicone 2, for one, is water-ready in 30 minutes. Keep feet and mops off it until it sets.
The back of the toilet
Full bead, or leave a gap at the back?
Some installers leave a small gap uncaulked at the back so a leak has somewhere to show; Bob Vila’s how-to suggests it. Fine Homebuilding’s install guide runs the bead around the joint where the toilet meets the floor.
The code text doesn’t carve out a gap: the joint is to be made watertight. Kohler’s instructions say to caulk around the base. My call is the same as before: caulk all the way around, then catch leaks the reliable way, by checking. If your plumber leaves a gap, ask why, and look at it when you clean.
Materials
Which caulk to use around a toilet
| Option | What it is | My take |
|---|---|---|
| 100% silicone, kitchen and bath | Waterproof, stays flexible, mildew-resistant versions are common. | My default for any floor. |
| Siliconized acrylic (latex) caulk | A water-based caulk with silicone added. | Fine if the label says kitchen and bath. Kohler calls for it where a sink meets the wall. |
| Grout | Rigid, cement-based. | Some installers grout the base on tile. It can crack if the toilet ever moves. |
| Color | White or clear. | White to match the toilet; clear on busy tile or stone. |
Catching leaks
How to catch a failed wax ring without skipping the caulk
The answer to the hidden-leak worry isn’t skipping caulk. It’s looking. A failed seal tends to announce itself if you know what to watch for, and a few minutes a year covers most of it.
I recommend owners have the house re-inspected every 5 years, even with no plan to sell. Many inspectors offer an infrared scan as an add-on; a camera can flag a damp spot under a floor or behind a wall that you can’t see, and a moisture meter confirms it. InterNACHI’s inspection standards don’t require inspectors to use moisture meters, so ask for one. I also run an infrared scan of my own house once a year and re-caulk bathrooms about every 5 years.
Buying or selling
Buying or selling: what inspectors write up
Home inspectors run every toilet and report the ones that are damaged, loose at the floor or leaking. Expect a line like “toilet is loose, should be removed and reset using a new wax ring.” Inspectors don’t pull toilets themselves; they don’t replace wax rings, so they won’t risk breaking one.
Old, cracked or stained bathroom caulk at the toilet, tub and sink is one of the most common notes in a report. It’s cheap to fix, so fix it before anyone sees it. If a toilet ever overflowed into a ceiling and you filed a claim, expect a buyer’s insurer to ask about it and want proof of the repair.
More on the inspection itself is in what a home inspection covers and pre-listing inspections. What to fix before listing and what to ask for after an inspection are strategy I cover with clients in the seller guide and buyer guide.
FAQ
Frequently asked questions about caulking around a toilet
Should you caulk around a toilet?
Yes. Washington’s plumbing code (UPC 402.2, also in the Seattle Plumbing Code) says the toilet-to-floor joint must be watertight, and toilet makers’ instructions say to seal the base. Do it after the toilet is solid and leak-tested.
Is it code to caulk a toilet to the floor?
In Seattle and the rest of Washington, yes in effect: section 402.2 requires a watertight joint where the toilet meets the floor, and caulk is how that joint is made. Inspectors write up an unsealed base.
Why do some plumbers leave the back of the toilet uncaulked?
So a wax ring leak can show at the gap. The code doesn’t list that exception, and the leak can run into the floor anyway. I caulk all the way around and check for leaks instead.
What happens if you don’t caulk around a toilet?
Mop water and splashes run under the base, soak the subfloor and collect grime you can’t clean. It can also fail an inspection.
Should I caulk or grout around the toilet base?
Caulk. It stays flexible and seals. Grout is rigid and can crack if the toilet moves.
Silicone or latex caulk around a toilet? White or clear?
100% silicone rated for kitchen and bath is my default; a siliconized acrylic labeled kitchen and bath also works. White matches the toilet; clear suits busy tile.
How long after caulking can I use the toilet?
Check the tube. GE’s Advanced Silicone 2 is water-ready in 30 minutes; other products need longer. Keep mops and wet feet off it until it sets.
Does caulk stop a toilet from rocking?
It can hold it still, which is the problem: a toilet that rocked may have already broken its wax seal. Tighten the bolts, shim or reset it first, then caulk.
Why does the caulk around my toilet turn yellow or brown?
Old caulk picks up grime, moisture and mildew over time. Cut it all out, clean and dry the joint, and run a fresh bead.
How often should you re-caulk a toilet?
I re-caulk bathrooms about every 5 years, and right away if the bead cracks, pulls away or keeps staining.
What seals the toilet to the drain if not caulk?
A wax ring or a wax-free gasket on the flange, under the toilet. The Seattle Plumbing Code allows an approved gasket, washer or setting compound there. Caulk only seals the outside edge.
Can I caulk a toilet on vinyl plank or wood floors?
Yes. Use a flexible kitchen-and-bath caulk, keep the bead small and neat, and check your flooring maker’s install guide for wet areas.
The bottom line
Caulk the toilet. Make it solid first, leak-test it, then run one clean bead all the way around. That follows Seattle’s code and the manufacturer’s instructions, and it keeps the everyday water out.
Then catch the rare hidden leak the reliable way: watch for the signs, look below once in a while, and have the house checked every few years. More homeowner how-tos live in my home care advice library.
Sources
- 2021 Seattle Plumbing Code, Chapter 4, sections 402.2 to 402.8, City of Seattle / IAPMO
- Plumbing Code, Seattle Department of Construction and Inspections
- 2021 Seattle Codes to take effect November 15, 2024 (August 21, 2024 bulletin), Public Health – Seattle & King County
- Chapter 51-56 WAC, adoption of the 2021 Uniform Plumbing Code, Washington State Building Code Council
- Plumbing and gas piping applications and permits, Public Health – Seattle & King County
- Plumbing final inspection record, March 2023 (section 402.2 correction), City of Everett
- Dual-flush toilet installation and care guide 1115514-2, Kohler Co.
- Model 3851A toilet installation instructions 7302427-100 (3/19), American Standard
- Install a toilet, Saving Water Partnership (Seattle Public Utilities and partner utilities)
- GE Advanced Silicone 2 Kitchen and Bath caulk, Lowe’s product page
- Home Inspection Standards of Practice, plumbing, InterNACHI
- How to install a toilet, Fine Homebuilding
- Should you caulk around the toilet?, Bob Vila